THZ LAB LOG [0] - RUNNING RADAR USECASES ON TI AWR 2243 EVM USING AN SD CARD
This blog expects the readers’ familiarity with the cascade radar sensor or the mmWave studio, preferably on the windows platform. Although TI has documentation on how to do the following, I had to spend a fair amount of time on the forum to get things working as intended. Thanks to some swift responses on the forum, the radar saw first images. I hope this helps you cut down the additional time you’ll otherwise spend on debugging issues whilst trying to run use cases. tldr; there’s a checklist in the end.
AWR2243
The Texas Instruments AWR2243 mmWave Cascade Radar evaluation board is a 4 chip FMCW (Frequency Modulated Continuous Wave) radar sensor that supports long range beam forming applications and short range MIMO applications such as object detection, long range radar etc. The evaluation board boasts an antenna field of view of about +-70 degrees with an angular resolution of 1.4 degrees which open doors to a plethora of applications.
 TDA 2xx Block Diagram (Credits: Texas Instruments)
The radar is powered by a TDA2xx capture card that has a Dual Cortex A-15 SOC, a Dual DSP C66x and several other high performance processing capabilities to enable several real time applications.
THE RADAR SDK
The PROCESSOR-SDK-RADAR is one of the two multi-processor software development kits available for creating, accessing, and processing multiple data flows using the evaluation kits powered by the Ti TDAxx capture cards.
Once installed, we can access the list of use cases under the path:
../PROCESSOR_SDK_RADAR_03_08_00/vision_sdk/docs/Radar/Processor_SDKRadar_Usecases.xslx
INSTALLATION INSTRUCTIONS
The Radar SDK can be downloaded for free under the name PROCESSOR_SDK_CASCADE_RADAR. Make sure to install the latest update for your version of the board (e.g., PROCESSOR_SDK_RADAR_03_08_00_00.exe for TDA2xx).
Note: For windows machines, install the SDK at a top-level directory (e.g., the root folder) to avoid environment variable character length limits.
BUILDING THE APPLICATION
To load firmware using an SD Card, you need a binary/application image. The process begins by setting up rules in the Rules.make file under PROCESSOR_SDK_RADAR_03_08_00/vision_sdk/build/.
USECASE CONFIGURATION
The Rules.make file sets up the environment. For sample use cases on a windows machine, the following configuration was used:
MAKEAPPNAME?=appsMAKECONFIG?=tda2xx_cascade_bios_radar
Available sample use cases:
- Cascade Radar Capture + Null
- Cascade Radar Capture + Radar Object Detection (DSP) + Network Tx
- Cascade Radar + FFT (EVE) + Tx Beam Form Static Map (DSP) + Network Tx
VERIFYING NETWORK CONFIGURATION
If the serial terminal shows 0.0.0.0, you may need to configure a static IP. This is handled in NDK_Config.cfg under PROCESSOR_SDK_RADAR_xx_yy_zz/vision_sdk/links_fw/src/rtos/bios_app_common/tda2xx/cfg.
- Set
enableStaticIPEth0 = 1. - Default IP:
192.168.1.200. - Computer IP:
192.168.1.101(Subnet:255.255.255.0, DNS:192.168.1.1).
COMMANDS TO BUILD THE FIRMWARE
Run these commands in order:
$ gmake -s -j2 depend    # building dependencies
$ gmake -s -j2           # building the firmware
$ gmake -s sbl           # building the MLO file
$ gmake -s appimage      # building appimage
Required Files for SD Card:
- MLO file: Found in
.../binaries/apps/tda2xx_cascade_bios_radar/sbl/sd/opp_xxx - App Image: Found in
.../binaries/apps/tda2xx_cascade_bios_radar/vision_sdk/bin/tda2xx-evm/sbl_boot/
SERIAL COMMUNICATION
Use a serial emulator like TeraTerm. Connect to the lower numerical COM port and power on the board to see the boot sequence and use case selection menu.
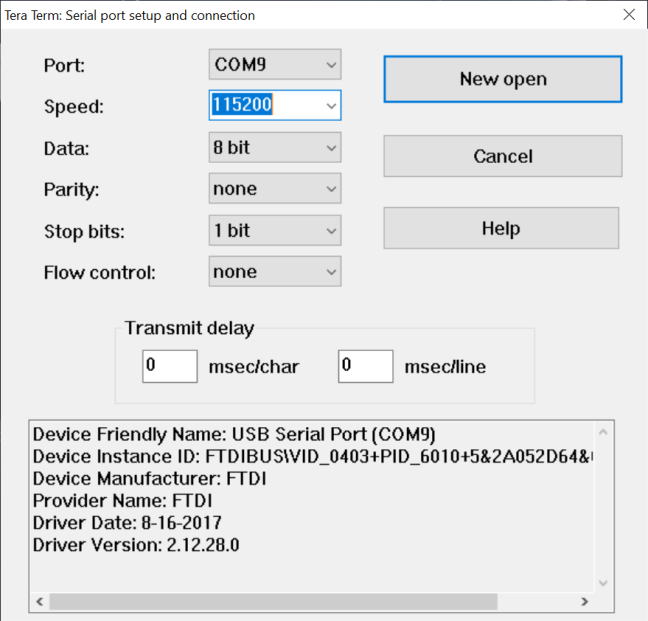 Serial connection settings window (TeraTerm)
RUNNING THE USECASES
- Select 1 for Radar Usecases.
- Select option b for Tx Beam forming.
- Select 1 for TFDTP protocol (supported by the provided MATLAB scripts).
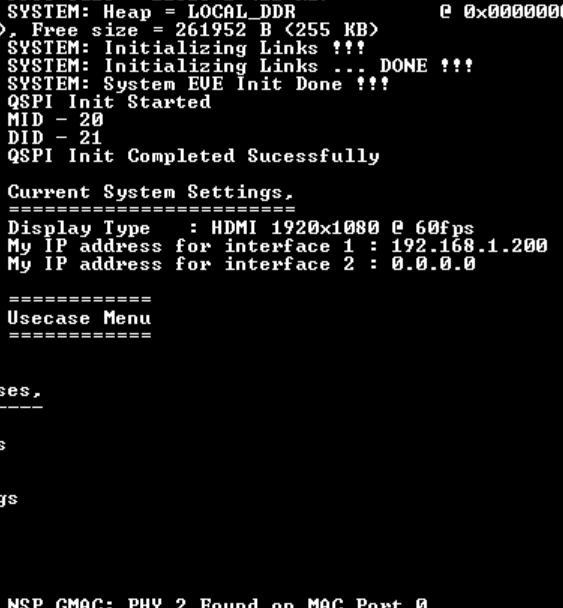
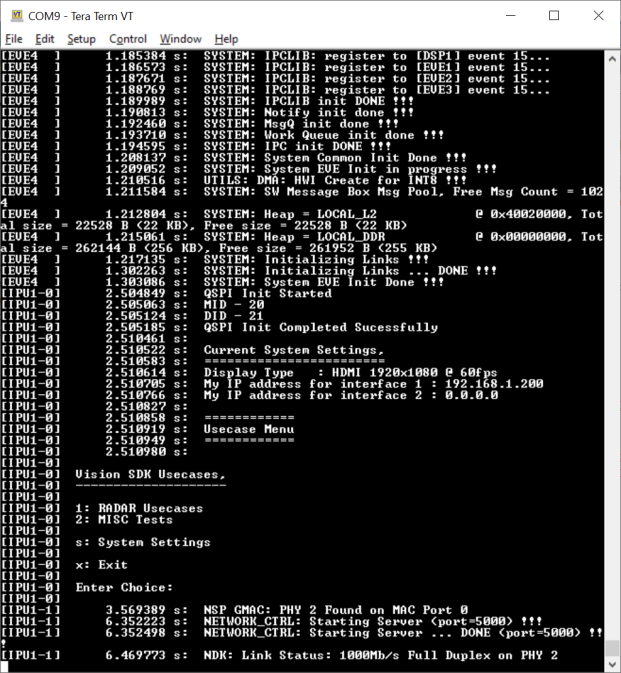 Device startup sequence and top level menu
 Radar Usecase selection menu
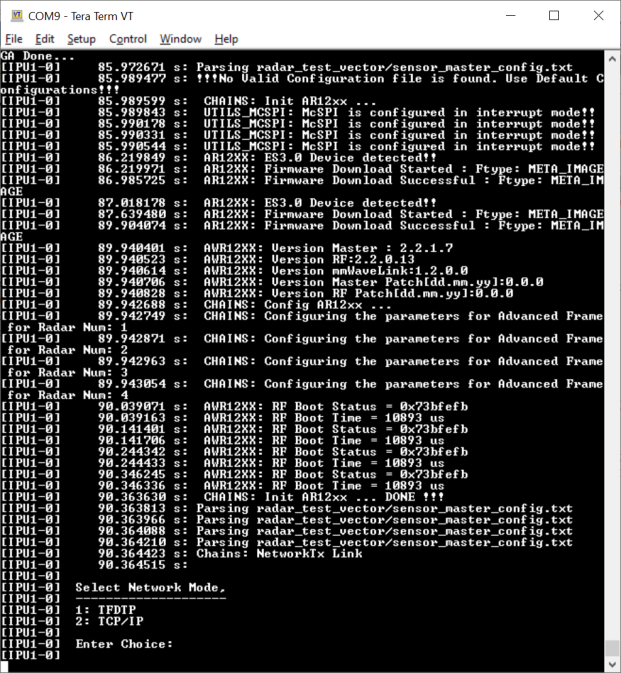 File/network transfer protocol menu
Run the MATLAB script radar_cascade_bf_demo.m found in the SDK:
>> radar_cascade_bf_demo('192.168.1.200', '192.168.1.101','BB-44-33-22-11-AA', 'TI', 5, 1)
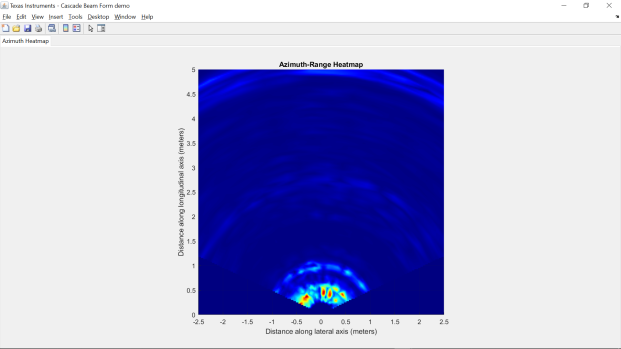 Real-time Radar capture figure (MATLAB GUI)
CHECKLIST
- Format SD Card to FAT32.
- Check
MAKECONFIGinRules.make. - Check
NDK_Config.cfgfor network settings. - Build Dependencies.
- Build the application.
- Build an MLO File.
- Build the AppImage.
- Load AppImage and MLO files on the SD Card.
- Check DIP Switches on the Capture Card.
- Load SD Card into the board.
- Connect to Serial interface.
- Run the usecases.
- View output on MATLAB.